About ACM Publications
For more than 60 years, the best and brightest minds in computing have come to ACM to meet, share ideas, publish their work and change the world. ACM's publications are among the most respected and highly cited in the field because of their longstanding focus on quality and their ability to attract pioneering thought leaders from both academia and industry.
Search Digital Library
Ceasing Print Publication of ACM Journals and Transactions
ACM has made the decision to cease print publication for ACM’s journals and transactions as of January 2024. There were several motivations for this change: ACM wants to be as environmentally friendly as possible; print journals lack the new features and functionality of the electronic versions in the ACM Digital Library; and print subscriptions, which have been declining for years, have now reached a level where the time was right to sunset print. Please contact [email protected] should you have any questions.
ACM Boasts Strong Impact Factors
ACM publications had an impressive showing in the newest Journal Citation Reports from Clarivate Analytics. ACM Computing Surveys continued its impressive ascent, receiving an impact factor of 23.8, up from 16.6 in 2023, and placing it first out of the 143 journals in the Computer Science, Theory & Methods category. Communications of the ACM boasted continued strong performance, with an impact factor of 11.1, placing it first in the Computer Science, Hardware & Architecture category for the second year in a row; third of 131 titles in the Computer Science, Software Engineering category; and sixth of 143 journals in the Computer Science, Theory & Methods category.
ICPS Is Now Open Access
In a major step in its transition to fully Open Access (OA) publication of all content on the ACM Digital Library, ACM has transitioned the International Conference Proceedings Series (ICPS) to a fully OA publishing model, as of January 2024. In the new model, all ICPS papers are made OA upon publication, and existing ICPS papers will be converted to OA. Some authors who are not at ACM Open institutions will be required to pay Article Processing Charges (APCs). The model will apply to all conferences for which the Call for Papers issued on or after January 1, 2024.

ACM Opens First 50 Years Backfile
ACM has opened the articles published during the first 50 years of its publishing program, from 1951 through the end of 2000, These articles are now open and freely available to view and download via the ACM Digital Library. ACM’s first 50 years backfile contains more than 117,500 articles on a wide range of computing topics. In addition to articles published between 1951 and 2000, ACM has also opened related and supplemental materials including data sets, software, slides, audio recordings, and videos.

Proceedings of the ACM Series
Proceedings of the ACM (PACM) is a journal series that launched in 2017. The series was created in recognition of the fact that conference-centric publishing disadvantages the CS community with respect to other scientific disciplines when competing with researchers from other disciplines for top science awards and career progression, and the fact that top ACM conferences have demonstrated high quality and high impact on the field. See PACMs on Programming Languages, Interactive, Mobile, Wearable and Ubiquitous Technologies, Measurement and Analysis of Computing Systems, and HCI.

PACM on Software Engineering
Proceedings of the ACM on Software Engineering (PACMSE) is a new Gold Open Access journal publishing top-quality, original research on all aspects of software engineering, from requirements elicitation to quality assessment, design, maintenance, evolution, and deployment. PACMSE covers a broad range of topics and methods that help conceive, create, and maintain better software be it embedded, cloud-based, mobile and ubiquitous, or runs on conventional computers. The journal operates in close collaboration with the Special Interest Group on Software Engineering (SIGSOFT).


Open Access Publication & ACM
ACM exists to support the needs of the computing community. For over sixty years ACM has developed publications and publication policies to maximize the visibility, access, impact, trusted-source, and reach of the research it publishes for a global community of researchers, educators, students, and practitioners.
ACM Books
New Title from ACM Books: Thinking about Programs
Thinking About Programs is based on Gavin Lowe's experience of 30 years of teaching programming at the University of Oxford and is an excellent choice for early programming courses offered by universities worldwide. It is a rigorous and thoughtfully structured textbook designed to equip students with both the theoretical underpinnings and practical skills essential in today’s programming landscape. Combining pedagogical clarity with up-to-date industry relevance, the book guides learners through fundamental programming concepts, algorithmic thinking, and problem-solving strategies while fostering a deep understanding of computational logic.

New Title from ACM Books: Sustainable Interactive Wireless Stickers
Today’s Internet of Things (IoT) devices are bulky, expensive, require battery maintenance, and involve costly installation. In contrast, the interactive stickers introduced in Sustainable Interactive Wireless Stickers: From Materials to Devices to Applications are low maintenance, inexpensive, and easy to deploy. Focusing on power, form factor, and cost as system design parameters, Nivedita Arora describes stickers that have simple circuitry and can sustain themselves while wirelessly communicating and responding to various human Interactions.

New Title from ACM Books: Calculated Imagery
Calculated Imagery: A History of Computer Graphics in Hollywood Cinema by Mark J. P. Wolf is a comprehensive history of computer graphics in Hollywood cinema. As the first such work of its kind, it is an essential reference for anyone interested in the history of cinema, visual effects, or computer graphics, and the industries of which they are a part. Throughout the book, the histories of individuals, companies, films, and computer graphics techniques are explored in detail, as well as changes in the visual effects (VFX) industry itself over time.

New Title from ACM Books: Indistinguishability Obfuscation from Well-Studied Assumptions
Software obfuscation is used in cryptography to transform source code to make it unintelligible without altering what it computes. As a software security mechanism, it is essential that software obfuscation have a firm mathematical foundation. In Indistinguishability Obfuscation from Well-Studied Assumptions, Aayush Jain uses the research which earned him the ACM Dissertation Award to establish the feasibility of mathematically rigorous software obfuscation from well-studied hardness conjectures. The mathematical object that the author constructs, indistinguishability obfuscation, is considered a theoretical “master tool” in the context of cryptography.

Practical Content from ACM Queue
Program Merge: What's Deep Learning Got to Do with It?
If you regularly work with open-source code or produce software for a large organization, you're already familiar with many of the challenges posed by collaborative programming at scale. And the scale of the problem has gotten much worse. This is what led a group of researchers at MSR (Microsoft Research) to take on the task of complicated merges as a grand program-repair challenge—one they believed might be addressed at least in part by machine learning. To understand the thinking that led to this effort and then follow where that led, Erik Meijer and Terry Coatta spoke with three of the leading figures in the MSR research effort, called DeepMerge

The Point is Addressing
ACM Queue’s "Research for Practice" serves up expert-curated guides to the best of computing research, and relates these breakthroughs to the challenges that software engineers face every day. In this installment, Daniel Bittman curates a collection of papers about "anything related to far-out memories." He includes more than 30 years of research, from single-address-space operating systems, to software-based distributed shared memory, to far memory offload, to single-level stores for persistent memory. The featured papers challenge assumptions about isolation, sharing and locality, transparency, and movement of memory and computation. The thread that ties all these selections together in Bittman's analysis is the topic of addressing, or how data references data.

Publish in the ACM International Conference Proceedings Series
The ACM International Conference Proceeding Series (ICPS) provides a mechanism to publish the contents of conferences, technical symposia and workshops and thereby increase their visibility among the international computing community. The goal of this program is to enable conferences and workshops to cost effectively produce print proceedings for their attendees, while also providing maximum dissemination of the material through electronic channels, specifically, the ACM Digital Library.
Overleaf Allows Authors to Collaborate
Overleaf is a free, cloud-based, collaborative authoring tool that provides an ACM LaTeX authoring template. Authors can write using Rich Text mode or regular Source mode. The platform automatically compiles the document while an author writes, so the author can see what the finished file will look like in real time. The template allows authors to submit manuscripts easily to ACM from within the Overleaf platform.

ACM Policies on Authorship
Anyone listed as Author on an ACM paper must meet certain criteria, including making substantial intellectual contributions to some components of the original work and drafting and/or revising the paper.
Authors submitting papers for peer-review to ACM publications will represent that the paper submitted is original; that the work submitted is not currently under review at any other publication venue; that they have the rights and intent to publish the work in the venue to which it is submitted; and that any prior publications on which this work is based are documented appropriately.
Read the entire set of criteria in the Policy on Authorship.
ACM Conflict-of-Interest Policy
The Conflict of Interest policy outlines what constitutes a conflict of interest (COI) for ACM publications; who is in a position to identify and report potential COIs; and how a potential COI should be managed. The policy applies to any material that is formally reviewed or refereed as per ACM policy; awards based on content published in ACM venues; and authors, reviewers, editors, conference program committee members, judges, and other persons associated with ACM-published materials.
The policy provides specific guidelines for common instances with the goal of assisting in the process of identifying and resolving potential conflicts of interest. It also describes how the policy can be augmented, and how exceptions may be approved.
Grand Challenges in Trustworthy Computing at 20: A Retrospective Look at the Second CRA Grand Challenges Conference
To commemorate the 20th anniversary of the 2003 Computing Research Association (CRA) Gordon-style Conferencea on Grand Challenges in Trustworthy Computing, the original attendees were invited to a virtual retrospective. Participants were invited to reconvene online for a six-week period to review the progress made on these challenges, evaluating successes, failures, and lessons learned. In the September issue of Communications of the ACM Richard A. DeMillo and Eugene H. Spafford distill those discussions, offering insight for a new generation of cybersecurity professionals who face many of the same threats today in an ever-evolving landscape
Get Involved - Be an Editor-in-Chief
ACM Transactions on Programming Languages and Systems Names Alastair Donaldson as EiC
ACM Transactions on Programming Languages and Systems (TOPLAS) has named Alastair Donaldson as Editor-in-Chief for a three-year term starting September 1, 2025 and ending August 31, 2028. Donaldson is a Professor in the Department of Computing at Imperial College London.

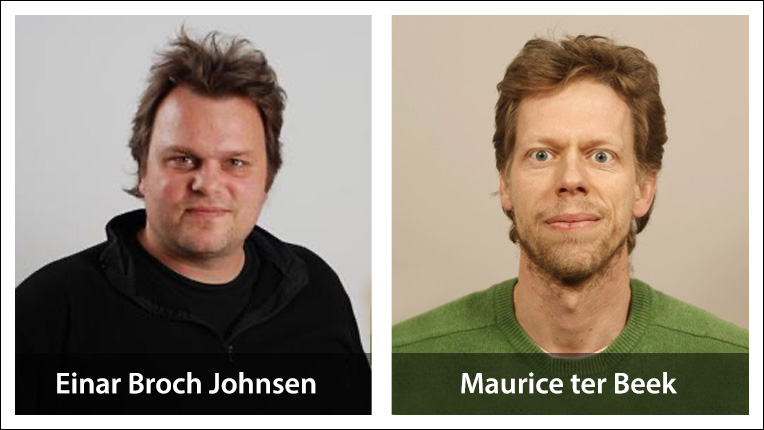
ACM Formal Aspects of Computing Welcomes New Co-Editors-in-Chief
ACM Formal Aspects of Computing (FAC) welcomes Einar Broch Johnsen (University of Oslo, Norway) and Maurice ter Beek (CNR-ISTI, Italy) as its new Co-Editors-in-Chief for the term of July 1, 2025 to June 30, 2028.

ACM Computing Surveys Welcomes New Co-Editors-in-Chief
ACM Computing Surveys (CSUR) welcomes My T. Thai (University of Florida, USA) and Hanghang Tong (University of Illinois at Urbana-Champaign, USA) as Co-Editors-in-Chief, with a term beginning July 1, 2025.
ACM AI Letters Welcomes New Co-Editors-in-Chief
ACM's new journal, ACM AI Letters (AILET)—which aims to become the premier rapid-publication venue for impactful, concise, and timely communications in AI—welcomes their inaugural Co-Editors-in-Chief. They are Nitesh Chawla, University of Notre Dame, USA; Barry O’Sullivan, University College Cork, Ireland; and Richa Singh, IIT Jodhpur, India. Their term is from June 1, 2025 through May 31, 2028. For more information on AILET, contact: [email protected].

ACM TAISAP Welcomes New Co-Editors-in-Chief
ACM's new journal, ACM Transactions on AI Security and Privacy (TAISAP)—which aims to develop methods for assessing the security of AI models, AI-enabled systems, and broader AI environments—welcomes their inaugural Co-Editors-in-Chief. They are Murat Kantarcioglu (Virginia Tech), Patrick McDaniel (University of Wisconsin-Madison), Sagar Samtani (Indiana University). Their term is from April 1, 2025 through March 31, 2028.

Call for Papers: CACM Practice Section
Communications of the ACM has long had a strong academic and research focus, but it also regularly publishes articles of interest to practitioners. CACM is promoting its new Practice section to be co-equal with its long-standing Research section. The new Practice section will accept submissions and publish articles of lasting interest that enhance practitioners’ understanding of computing and enhance their job performance. Visit the CACM Practice call page for more information, and pass the word onto your friends and colleagues who may be interested in contributing.
New ACM Journals
ACM constantly adds new journals to its portfolio, each focused on a different topic and interest, to ensure that its publications program constitutes a vast and comprehensive archive of computing innovation. Here are the latest specialized journals which you can explore, enjoy, and contribute to.
ACM Updates Its Peer Review Policy
ACM is pleased to announce that its Publications Board has approved an updated Peer Review Policy. If you have any questions regarding the update, the associated FAQ addresses topics such as confidentiality, the use of large language models in the peer review process, conflicts of interest, and several other relevant concerns. If there are any issues that are not addressed in the FAQ, please contact [email protected].

ACM Statement on Trade & Government Sanctions for ACM Publications
ACM supports the unrestricted publication and dissemination of scientific, educational, and technical information to the global community of computing professionals and students. However, at the same time ACM is bound to comply with laws and regulations in the legal jurisdictions ACM operates—including in the US, EU, UK, and elsewhere around the world—that have the potential to limit how ACM operates around the world with respect to Publications. Specifically, Geographic Sanctions and Sanctions on Individuals.

Web of Science Reviewer Recognition Service
In an effort to better serve—and incentivize—ACM reviewers, ACM has partnered with the Web of Science Reviewer Recognition Service, which allows reviewers to create a profile and to track, verify and promote their efforts for ACM publications. This service—operating on over 5,000 scholarly journals—is owned by Clarivate Analytics and offers a verified record of a reviewer’s editorial activity for a publication that can be used for CVs, profiles, tenure packages, and more.

Promote Your Work with Kudos
Kudos is a free service that you can use to promote your work more effectively. After your paper has been accepted and uploaded to the ACM Digital Library, you'll receive an invitation from Kudos to create an account and add a plain-language description. The Kudos “Shareable PDF” allows you to generate a PDF to upload to websites, such as your homepage, institutional repository, preprint services, and social media. This PDF contains a link to the full-text version of your article in the ACM DL, adding to download and citation counts.

Learn More about Features in the New ACM Digital Library
More precise search. Alerts when new articles in your area of interest are published. Expanded article pages. More informative author profile pages. Integrated journal homepages and expanded content on ACM SIGs and conferences. These are just some of the features you'll find in the new ACM DL. Check out our series of emails about these and other enhancements, and discover more about the new DL experience.
Concerning the Responsible Use of AI in the US Criminal Justice System
Artificial intelligence (AI) is advancing quickly and is being adopted in most industries. During the Biden-Harris administration, Executive Order 14110 directed agencies to develop guidelines for acceptable uses and regulation of AI. The NIJ requested input on how AI will affect each layer of the justice system, and how to develop a plan to implement AI in ways that are accurate, fair, and constitutional. In this article from the September issue of Communications of the ACM, Cristopher Moore et al. respond.
Ubiquity’s Communication Corner Helps Improve Writing and Speaking Skills
Have you always wondered how you can improve your writing and communicate more effectively? Ubiquity, ACM's online magazine of critical analysis and in-depth commentary, offers Communication Corner, a monthy feature by Philip Yaffe, retired Wall Street Journal reporter and Ubiquity editorial board member. Each installment includes an essay on a fundamental aspect of effective writing or speaking; an exercise to help you practice writing on the topic being discussed; and an invitation to submit your exercise for possible critique.

New Authoring Templates for ACM Publications
ACM has transitioned to new authoring templates. The new template consolidates all eight individual ACM journal and proceedings templates. The templates are updated to the latest software versions, have been developed to enable accessibility features, and use a new font set.

New Options for ACM Authors to Manage Rights and Permissions
Changes expand access to Special Interest Group conference proceedings. ACM offers flexible options that fit computing researchers' individual needs.
Bringing You the World’s Computing Literature
The most comprehensive collection of full-text articles and bibliographic records covering computing and information technology includes the complete collection of ACM's publications.
Get Involved with ACM
ACM is a volunteer-led and member-driven organization. Everything ACM accomplishes is through the efforts of people like you. A wide range of activities keeps ACM moving: organizing conferences, editing journals, reviewing papers and participating on boards and committees, to name a few. Find out all the ways that you can volunteer with ACM.